
If you’re anything like most small business owners, you have the nagging sense you should improve the user experience of your website, but don’t know where to start or how to do it. In fact, just the thought of improving your website feels overwhelming.
The good news is, improving the user experience (UX) of your website is easier than you think! In this post I’ll teach you how to utilize one the the most important tools I use with my web design clients to create a great UX: personas.
What is a persona?
A persona is a tool that helps us think about our website from our users’ perspective. We are, after all, talking about improving our user experience. There’s no generic way to do this. What’s helpful for the users of one business might be counter-productive for the users of another. So the first thing we need to do when trying to improve the UX of our website is think about our users.
To begin, download my free persona template. Once you have it, print out a few copies of it. We’ll go through how to fill out this template together.
Before you do anything else, think about your specific target audience.
Take some time to consider who the people who come to your website are. My guess is you know them well! You’ve worked with them before and have had countless conversations with them. Now, think of one person in particular who has characteristics that are common to many of your users. For example, maybe you’re an artist who draws custom portraits. In this example, perhaps it’s common for people to hire you to do a custom portrait of a loved one for a gift. Great! That can be the basis for your first persona!
Now fill in part 1 of the persona template – Basic Info
To help you understand how to fill out the persona template, I’ll walk you through an example. We’ll use the example of a custom portrait artist that I mentioned earlier.
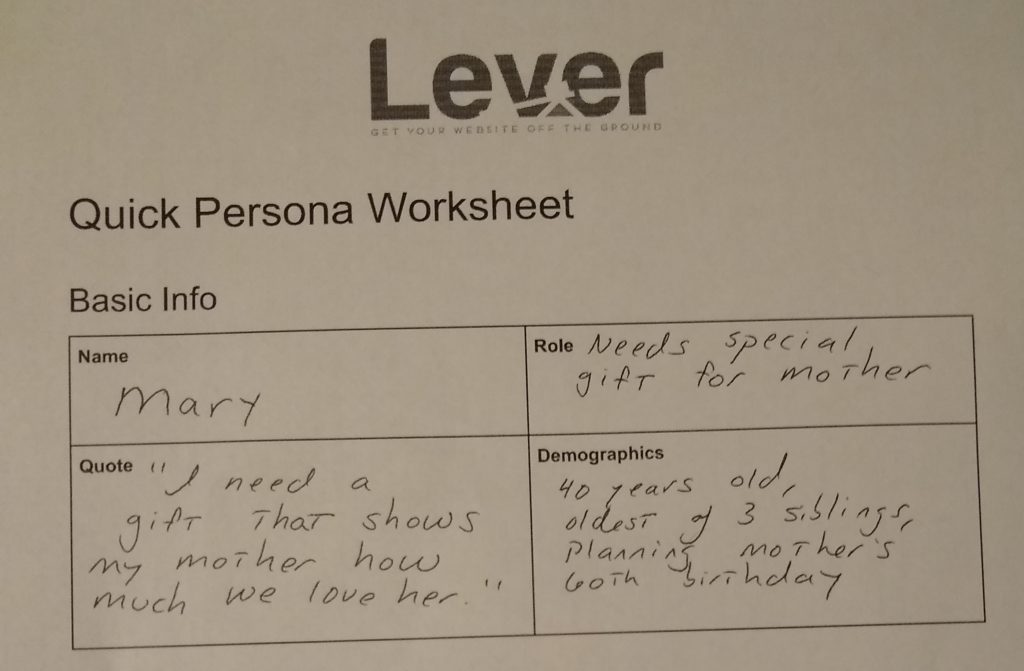
The first thing we need is a way to quickly refer to this persona. Giving a name helps humanize our persona, and it helps them stick in our brains a little better. Let’s name our sample persona “Mary.” The first box on the persona template is a place to write the persona’s name.
Next we’ll fill out their “role.” By role we mean who they are to you. In our example case, the role is “Needs special gift for mother.”
The “quote” section of the persona template is a chance for you to go a little deeper about who your persona is in relation to what you do. Keeping with our example above, our quote might be “I need a gift that shows my mother how much I love her.”
The last part of the “Basic Info” section of our persona template is demographics. This is basic demographic info like age, income, etc. For our example, the important demographics are “40 years old, oldest of 3 siblings, responsible for planning mother’s 60th birthday.”
Here’s how our example persona worksheet looks so far.
Next fill out part 2 of the persona template – Motivation and Behavior
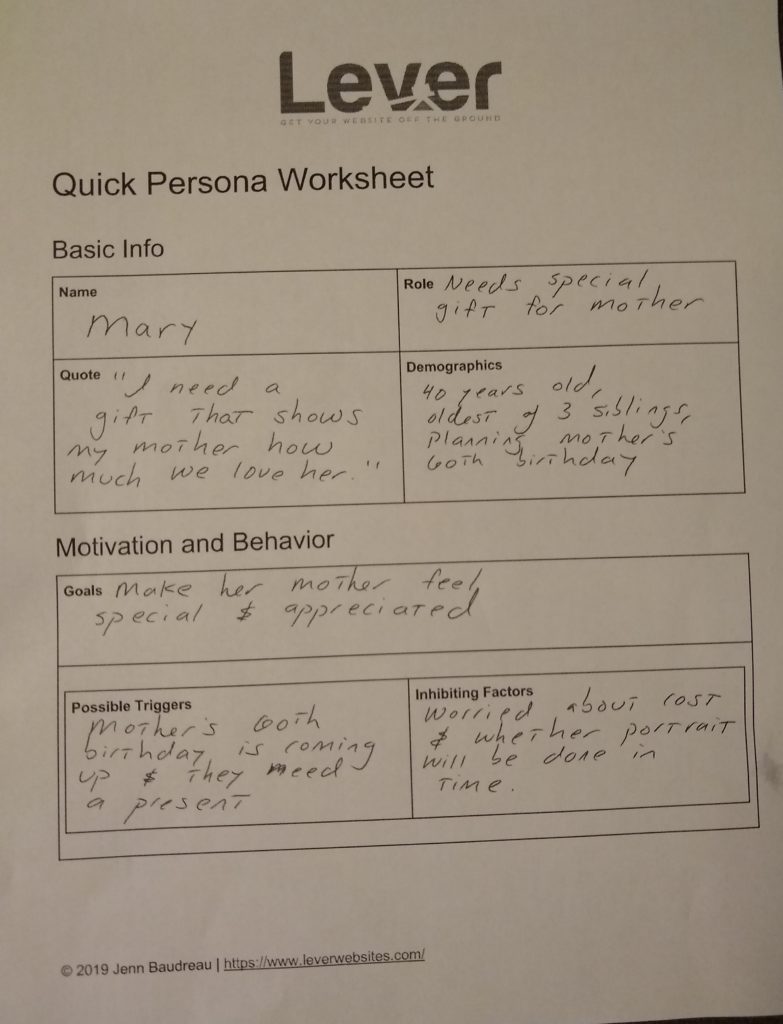
Now it’s time to dig a little deeper so we can focus on your client’s motivation and behavior. First, think about their goals. This is a very important section, but it’s easy to misunderstand! Here we want to think about the underlying thing your client wants to accomplish by purchasing your services. In our example, the goal for our persona is to “make her mother feel special and appreciated.” (Note that I did not say her goal was to “buy a portrait,” as that is a potential strategy she can use to achieve her goal, not the goal itself.)
For the “possible triggers” section, we think about “why now?” Why is this person considering your services today? For our example, our persona’s trigger is “Mother’s 60th birthday is coming up and they need a present.”
Lastly in this section is “inhibiting factors.” What will make it hard for this persona to “say yes” to your services? Are they worried about the cost? Are they concerned about the quality? Are they unsure of how to proceed? For our example persona, the inhibiting factors are “worried about cost and whether or not they can get the portrait done in time.”
Here’s the persona template filled out for our sample persona.
After you’ve completed one persona template, do the same thing for a different persona on your second printed copy. In keeping with our portrait artist example, the role for the second persona might be “recent college graduate treating herself to something special.”
Now you’re ready to use these personas to evaluate your website from your users’ perspective.
It’s important that the content on your website speak to your target audience’s goals, while addressing and alleviating their concerns.
I’ve written a thorough guide on how to use these personas to conduct a “persona walk-through” of your website. Completing this persona walk-through will give you clear action steps for how to improve the UX of your website. You can read it here.
Dive Deeper
The quick personas you did today will serve as a helpful foundation for some great “quick wins,” but you can get even more value by diving deeper. For people who already have a website, but need to make it better in order to grow their business or better serve their clients, I offer 1:1 website coaching.
This is excellent! As a new business owner, I’ve spent many hours working on (and re-working) my website. I’ve struggled with how to build a website that is informative, interesting, and engaging. This is just the puzzle piece I’ve been looking for….. Identifying my potential clients and creating personas for them gives me eyes to see my website in new ways. Thank you! I look forward to the next 6 days.